Table of Contents
- Quick answer: what condo cabinet painting costs and delivers
- Is painting condo kitchen cabinets worth it?
- How much does cabinet painting cost in a Toronto condo?
- The products and the cure times that make a real cabinet job
- Can you paint laminate and thermofoil condo cabinets?
- How the pro cabinet process actually runs, step by step
- How long does it take in an occupied condo?
- How to clean painted cabinets without wrecking them
- What colours work in small Toronto condo kitchens?
- When you paint, when you replace, and when you call a pro
Quick answer: what condo cabinet painting costs and delivers
Painting condo kitchen cabinets in Toronto costs roughly $1,800 to $5,000, about a quarter of the $20,000-plus a replacement runs, and a properly cured job lasts 10 to 15 years. The result is a new-looking kitchen in a few days of active work. The catch most failed jobs ignore: the cabinet enamel keeps hardening for two to four weeks after the final coat, and reinstalling doors before then is what causes them to stick and imprint.
Key Takeaways
- $1,800 to $5,000 for cabinet painting vs $20,000+ for replacement.
- Cabinet enamels like Benjamin Moore Advance need 16 hours between coats and up to 30 days to reach full hardness per the technical data sheet. INSL-X Cabinet Coat cuts the full-cure window to 14 days.
- A real cabinet paint job clears ANSI/KCMA A161.1, the factory-cabinet finish standard, including 24-hour exposure to mustard, coffee, vinegar, and 100-proof alcohol.
- Laminate and thermofoil cabinets need Zinsser B-I-N shellac primer, which bonds to slick surfaces without sanding per its TDS.
- Adhesion is a measurable number via ASTM D3359 cross-cut tape test — a properly done job hits 5B (no removal).
- HVLP spray with a 1.3-1.5 mm fine-finish tip is what produces the no-brush-mark "factory" look.
Most condo kitchens I walk into don't need to be replaced. They need a proper repaint. The boxes are fine, the layout works, and the only thing dating the kitchen is a tired oak finish or a builder-grade laminate from fifteen years back. Replacement is a $20,000-plus job. Paint is a fraction of that, finished in a few days of active work.
Here's the catch most people don't see coming: cabinets are the least forgiving surface in the house to paint. They take more daily abuse than any wall. They get opened, splashed, wiped, slammed shut. The products have cure windows nobody mentions in the box copy. Skip the prep or rush the cure, and the finish goes sticky and peels inside a year. I get rescue calls about that every month.
What I'm going to walk you through: the cost, the products that hold and the ones that don't, the cure schedule the TDS actually says, where the line is between paint and replace, and what an honest quote looks like. For the bigger picture across your whole unit, start with the complete condo painting guide.
Is painting condo kitchen cabinets worth it?
For most condo kitchens, yes. You get a new-looking kitchen for about a quarter of what a replacement costs. A full replacement in a Toronto condo runs north of $20,000 once you add boxes, doors, hardware, counters, and installation. Painting the cabinets you already have lands closer to $1,800 to $5,000. That's the math.
The value case is strongest when the cabinet boxes are sound. Solid wood, plywood, even decent laminate in good shape all take paint well. You're paying to refresh a kitchen that's structurally fine. The other win is the disruption side: a few days of active work versus weeks of a gutted kitchen.
| Factor | Painting cabinets | Replacing cabinets |
|---|---|---|
| Typical cost (condo) | $1,800 to $5,000 | $20,000+ |
| Active work timeline | 3 to 5 days | Several weeks |
| Disruption | Kitchen mostly usable | Kitchen out of service |
| Lifespan | 10 to 15 years | 20+ years |
| Best when | Boxes are sound, layout works | Boxes damaged, layout wrong |
Painting stops making sense when the boxes are water-damaged, the particleboard's swelled, the doors are falling apart, or the layout itself doesn't work. Those are replacement situations. Paint can't fix any of them, and we'll tell you so rather than take your money to paint something that should be torn out. Had a CityPlace owner last year who wanted us to paint cabinets where the dishwasher leak had swelled the lower run a year prior. Walked away. She got a real renovation quote, replaced the lowers, and we came back to paint the new doors plus the salvageable uppers. Right call. For the full breakdown of when each makes sense, see painting vs replacing kitchen cabinets.
How much does cabinet painting cost in a Toronto condo?
$1,800 to $5,000 for most condos. The price is driven by three things: how many doors and drawers you have, what the cabinets are made of, and the size of the kitchen. Door count is the biggest one. Every door and drawer front is a separate piece we remove, prep, prime, and coat. Twenty pieces takes twice as long as ten.
The table below shows the rough ranges by kitchen type. Material and finish method shift you inside each band. Laminate and thermofoil need a bonding primer and slower prep than wood. A fully sprayed finish means heavier masking and door work off-site versus an in-place brush-and-roll job.
| Kitchen type | Typical professional cost |
|---|---|
| Small galley / one-wall | $1,800 to $2,800 |
| Standard L-shape | $2,800 to $4,000 |
| Large kitchen with island / glass uppers | $4,000 to $5,500+ |
These are first-party ranges from the condo kitchens we quote, not a generic national average, so treat them as a realistic starting point rather than a fixed price. The most accurate number comes from a quick look at the actual kitchen, because the door count and the cabinet material are what move the cost, and both are easy to confirm in person or from a few photos. For the full price breakdown, see our condo cabinet painting cost guide, and for how cabinet work fits a whole-unit budget, our 2026 Toronto condo cost guide.
The products and the cure times that make a real cabinet job
This is where the jobs are won or lost. The product and the cure time matter as much as the prep, and they're the parts homeowners never see in a quote. Let me walk you through what I actually use and why.
Benjamin Moore Advance: the cabinet-grade waterborne alkyd
Advance is a waterborne alkyd built specifically for trim and cabinets. It lays down like oil paint and cleans up with water, which is the trick that makes it the workhorse of cabinet finishing. The TDS numbers you need to know:
- Recoat: 16 hours. Rush this and the film stays soft and marks. That single rule is why a cabinet job isn't a one-day job.
- Light service: 5 to 7 days. You can carefully use the kitchen, but no slamming doors, no stacking heavy things against painted surfaces.
- Full hardness: up to 30 days. This is the one homeowners never hear about. Close doors firmly at day 5 and they'll imprint and stick by day 10. I've pulled cabinets apart that were stuck together because somebody reinstalled too soon.
- Zero-VOC tinted through Benjamin Moore's Gennex colorant system, well under the 100-150 g/L cap that Canada's VOC regulation (SOR/2009-264) sets.
Advance comes in satin (product code 792), semi-gloss (793), and high-gloss (N794). Most of the condo cabinets I finish get semi-gloss. It's the balance point between durability and a contemporary look.
INSL-X Cabinet Coat: when the kitchen has to come back faster
Same Benjamin Moore family, different chemistry. Cabinet Coat is a urethane-acrylic enamel with a faster cure window than Advance:
- Touch dry: 1 hour. Recoat: 6 hours.
- Full cure: 14 days instead of 30.
If the unit is occupied and the kitchen has to come back online, Cabinet Coat is what I reach for. Advance has a small edge on hardness after full cure, but cutting the safe-to-use window from a month to two weeks is usually the right trade. I'll often spec Cabinet Coat for a couple with a baby in the unit or someone working from home. Advance gets used when the family is moving in fresh.
Zinsser B-I-N: the laminate solution
The reason laminate and thermofoil cabinets can be repainted at all is shellac-based bonding primer. Per the Zinsser B-I-N technical data sheet, B-I-N bonds to "dense, glossy surfaces such as enamel paints and varnishes, paneling, laminates, glass and ceramic tile without the need for sanding or de-glossing." Recoat in 45 minutes; coverage about 500 sq ft per gallon.
Without B-I-N or an equivalent bonding primer, latex topcoats peel off thermofoil in sheets within months. This is the most common laminate-cabinet failure we get called to fix.
ANSI/KCMA A161.1: the factory finish standard
The Kitchen Cabinet Manufacturers Association administers ANSI/KCMA A161.1, the performance standard factory cabinets are certified against. Its finish tests are the bar a real cabinet paint job should clear:
- Chemical resistance, 24 hours of exposure: vinegar, lemon juice, orange juice, grape juice, ketchup, coffee, olive oil, 100-proof alcohol.
- Mustard, 1 hour. Mustard is the test that catches a soft finish; the turmeric stains anything not properly sealed.
- Detergent + water edge soak, 24 hours. No swelling, delamination, or film failure permitted.
A properly primed, properly cured Advance or Cabinet Coat finish passes the same tests factory cabinets pass. That answers the most common cabinet-painting question, "is a repainted cabinet really as good as a new one?" Yes, if the cure window is respected.
ASTM D3359: the objective adhesion check
If you want to know whether your painter actually got adhesion right, the answer is on a piece of tape. ASTM D3359 Method B is a cross-cut tape test: a small lattice of scored cuts in a hidden cabinet edge after cure, tape applied with firm pressure and pulled. The result is rated:
| ASTM D3359 rating | What it means |
|---|---|
| 5B | No coating removed |
| 4B | Less than 5% removed |
| 3B | 5-15% removed |
| 2B | 15-35% removed |
| 1B | 35-65% removed |
| 0B | More than 65% removed |
A properly primed cabinet should hit 5B on a hidden edge after full cure. A failed job sheets off cleanly. Any cabinet painter who is confident in their adhesion should be happy to demonstrate this on a test door before committing to a full kitchen.
For the full breakdown of enamel, sheen, primer, and coat count, see the best paint and finish for kitchen cabinets. To understand sheen across the whole unit, our guide to the best paint finish for a condo walks through where each one belongs.
Can you paint laminate and thermofoil condo cabinets?
Yes, and the technical reason it works is the shellac bonding primer covered above. Laminate and thermofoil cabinets are common in builder-grade Toronto condo kitchens from the 2000s onward, and the Zinsser B-I-N TDS explicitly lists laminate among the substrates the product bonds to without sanding.
The process is stricter than it is for wood. It starts with thorough degreasing to strip every trace of cooking film, then a careful scuff-sand to give the slick surface tooth (B-I-N does not require it for adhesion, but scuff-sanding adds insurance and a more even topcoat appearance), then B-I-N primer, then two coats of cabinet enamel. Skip any step on laminate and the topcoat peels off in sheets, which is the failure mode ASTM D3359 catches before the kitchen falls apart.
The one laminate situation that cannot be saved with paint is when the thermofoil is already peeling off the door, or the particleboard core has swollen from a leak or a dishwasher. That is moisture damage, and it is a replacement. For how the two materials compare on prep, durability, and cost, see painting laminate vs wood cabinets.
How the pro cabinet process actually runs, step by step
Prep is roughly 80 percent of a cabinet job. The cure is the part that gets skipped. Get both right and the finish lasts a decade. Get either wrong and you'll be calling someone like me in eighteen months.
Step 1: Doors off, labelled
Every door and drawer front comes off, with a number written somewhere hidden so each goes back exactly where it came from. Hinges in a bagged-and-labelled set per door. We finish doors flat for an even coat, and in an occupied unit we move them off-site so the dust stays out of your living room.
Step 2: Degrease, like you mean it
Every kitchen cabinet has a thin film of cooking grease on it that paint will never stick to. Doesn't matter how clean it looks. Clean every surface with a degreaser (TSP-substitute is standard now in most Toronto-area municipalities), let it sit, rinse with plain water, dry. On laminate the rinse step matters even more, because any cleaner residue under the bonding primer is going to read as a release agent.
Step 3: Sand or scuff, depending on the substrate
Wood gets sanded smooth with 120-150 grit, then a 220 finish pass. Laminate and thermofoil get a careful scuff with a 220-grit sanding sponge, just enough to give the bonding primer something to grip, not deep enough to cut through the laminate face into the particleboard underneath. Cut through and you'll see the fuzzy patch through the topcoat for the life of the job. Fill any dents or grain. Dust everything off with a tack cloth.
Step 4: Prime, matched to the substrate
Zinsser B-I-N for laminate, thermofoil, melamine, or any slick or stained surface. Shellac primer is the only thing that bonds to that stuff reliably. Standard waterborne primer for sanded wood and previously painted cabinets in good shape. The primer is what locks the finish down. Skip the bonding primer on laminate and the topcoat sheets off the first time someone wipes the door with a damp cloth. For the full degrease-sand-prime detail, see cabinet painting prep, step by step.
Step 5: Two coats of cabinet-grade enamel
Two coats of Benjamin Moore Advance or INSL-X Cabinet Coat. Sprayed with HVLP (1.3-1.5 mm fine-finish tip for waterborne enamel) or brushed and rolled with the same self-levelling product (spray vs brush compared). Respect the TDS recoat: 16 hours for Advance, 6 for Cabinet Coat. Rush either one and the second coat goes on too soon, traps unreacted material underneath, and you get a soft finish that marks under fingernails.
Step 6: Cure, then reinstall
This is where rushed jobs fail. Cabinet paint is dry to the touch in hours but keeps hardening for days. With Advance, light service is 5 to 7 days and full hardness is up to 30. With Cabinet Coat, full cure is 14 days. Doors reinstalled and slammed shut on day 3 will imprint and stick to the frame by day 10. I've pulled doors apart that were glued together because somebody put them back on too soon. We reinstall on a published schedule, and we tell owners not to fully load the cabinets with heavy plates and pots for the first two weeks. That's not us being precious. That's the product's curve.
How long does it take in an occupied condo?
Plan on 3 to 5 days for the active work, but the cabinet enamel keeps hardening for two to four weeks after the final coat depending on which product is used. This is the timeline that surprises owners.
A realistic schedule for a Toronto condo cabinet job:
| Phase | Time |
|---|---|
| Active painting (remove, prep, prime, two coats) | 3-5 working days |
| Door reinstallation (careful) | Day 5-7 |
| Light kitchen use | Day 5-7 |
| Full hardness, normal use (Advance) | Day 30 |
| Full hardness, normal use (Cabinet Coat) | Day 14 |
In an occupied unit we work to keep the kitchen usable for as much of the job as possible, finish doors off-site to keep dust down, and use zero-VOC or low-VOC products. Many Toronto condo boards require low-VOC paint anyway because of shared ventilation, and the lower odour matters a lot when you are living in the space while the work happens.
There is real disruption to a cabinet job, you will lose full use of the kitchen for part of it, but it is far less than a replacement, which can knock the kitchen out for weeks. The exact number of days comes down to door count and how many coats a colour change needs. For the day-by-day, see the cabinet painting timeline in an occupied condo, and for how it fits a whole-unit schedule, how long it takes to paint a condo.
How to clean painted cabinets without wrecking them
I'll level with you. A cabinet finish that hits ANSI/KCMA A161.1 on the day we hand it over will still fail in three years if you clean it wrong. Half my "the finish is dying" rescue calls are not actually rushed cure jobs. They're owners who scrubbed the cabinets the way they'd scrub a tile backsplash, and now the sheen is uneven and the colour is wearing through at the high-touch spots.
Three things, then I'll let you go.
Don't ever use a Magic Eraser. Magic Erasers are melamine foam. That's fine sandpaper in a sponge wrapper. Every pass strips a microscopic layer of sheen and pigment. People reach for them because they "don't scratch." They do. You just can't see it until a year in, when the surface goes dull and patchy. Microfibre cloth instead. Always.
The cleaner is dish soap and warm water. Two drops of unscented dish soap in a litre of warm water, on a microfibre cloth wrung out enough that it's damp but not dripping. Wipe in the direction of the panel or the grain if you can see one, then dry immediately with a second clean microfibre. Never leave water sitting. For real cooking grease, white vinegar 50/50 with warm water lifts the film without dulling the enamel.
Skip the kitchen cleaners. No abrasive scrub pads, no ammonia sprays, no all-purpose sprays with solvents in them, no citrus degreasers, no bleach. They were formulated for tile and stainless steel and they'll dull, soften, or yellow a waterborne alkyd enamel over time. They also void the warranty, so I'd be the wrong painter to call when it goes wrong.
That's it. Cabinets cleaned this way last the full 10-15 years between repaints, easy. Almost every early-failure call I get traces back to either rushed cure or the wrong cleaner. Both are completely preventable on your end.
What colours work in small Toronto condo kitchens?
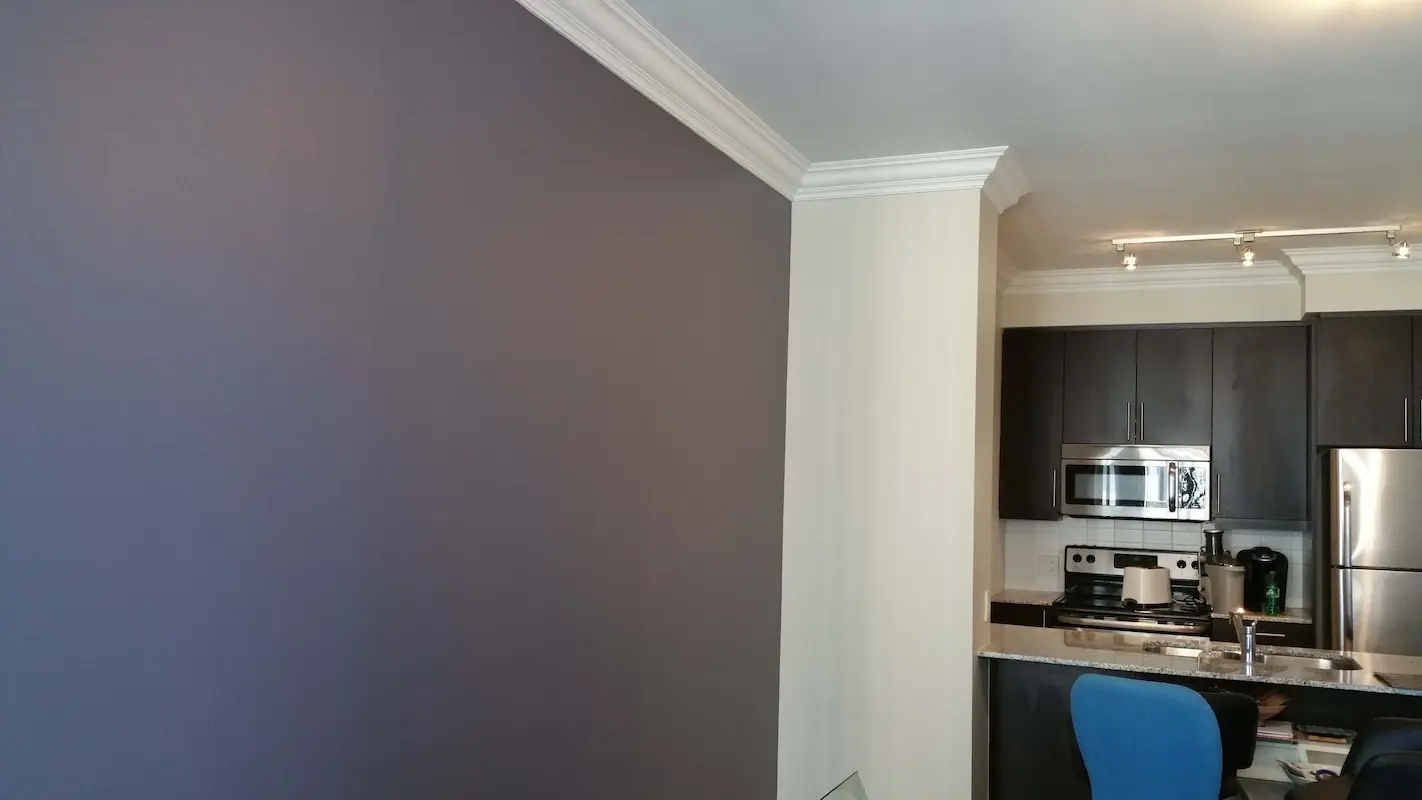
Light neutrals and soft whites, almost always. They bounce light and make a tight kitchen feel bigger and brighter. Most condo kitchens in this city are compact and open to the living area, so the cabinet colour sets the tone for the whole space, not just the kitchen.
Crisp whites and warm off-whites are the safe, resale-friendly default. They pair with almost any counter and backsplash. If you want more interest without shrinking the room, the move is two-tone: light upper cabinets and a deeper colour on the lower run or the island. Hale Navy. Wrought Iron. A muted forest green. We did a Fort York unit last summer with White Dove uppers and Hale Navy on the island, and the kitchen photographs three times more on the listing than the all-white version would have. That's the principle. The dark grounds the room without closing it down.
For cabinet-specific picks, see the best cabinet colours for small condo kitchens. For colour direction across the whole unit, the best paint colours for small Toronto condos and the best white paint colours for Toronto condos both apply directly to cabinet choices.
When you paint, when you replace, and when you call a pro
Paint when the cabinet boxes are sound and the layout works. Replace when the boxes are water-damaged or swollen, or the layout itself doesn't function for how you live. Paint solves a dated look. It can't solve a broken kitchen.
On the DIY question: cabinets are the least forgiving surface to paint yourself. The product specs leave you no room. 16 hours between coats. 30 days to full cure. ASTM D3359 5B adhesion on a hidden edge if you want to verify the job. The prep is exacting, the bonding primer for laminate has to be the right product, and the finish shows every shortcut because cabinets sit at eye level and get touched daily. I've watched confident DIYers paint a bedroom beautifully and then turn out sticky, peeling cabinet doors three months later. Cabinet redos are one of the more common rescue calls we get. If you want to weigh the broader DIY decision, our guide on painting your condo yourself lays out where the line falls.
If your boxes are sound and you want them looking new again, send a few photos through the quote form and I'll give you a number that won't change at the end of the job. We paint Benjamin Moore (Advance most of the time, Cabinet Coat when the occupancy window is tight), prime laminate with Zinsser B-I-N, take doors off-site so the dust stays out of your unit, work to your building's elevator and quiet-hour rules, and back the workmanship for five years. For the rest of the unit, our complete condo painting walkthrough covers it.
Chad Saygili is co-owner of Condo Painters Pro, a Toronto condo painting specialist. He has spent years painting condos across Toronto and the GTA, works exclusively with Benjamin Moore, and backs every job with a 5-year workmanship warranty.
MORE ABOUT OUR TEAM →